Supporting objects in Lychee slicer
1. Orienting the object
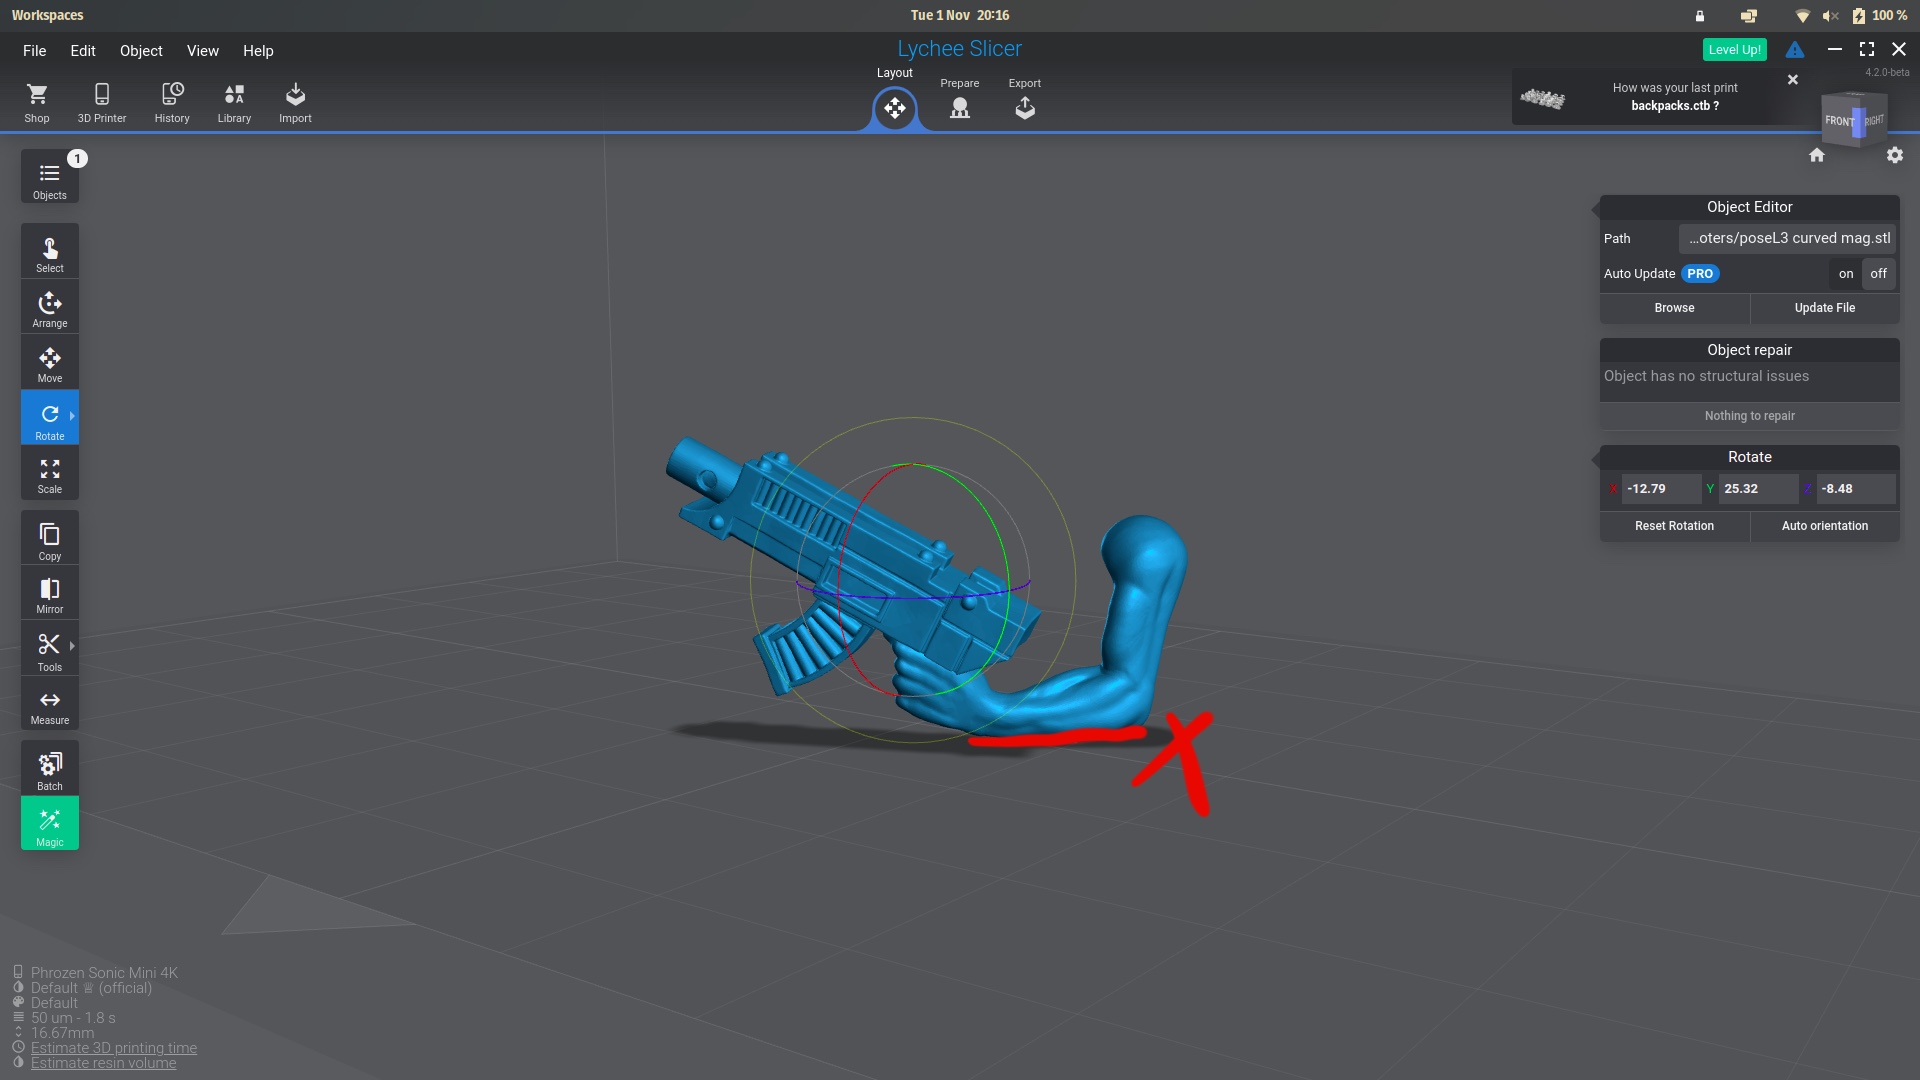
First and foremost: import the object into Lychee, and select the "Rotate" tool. Now, look at the object. As implied in the image below, you should rotate it to avoid having large, flat surfaces parallel to the build plate.
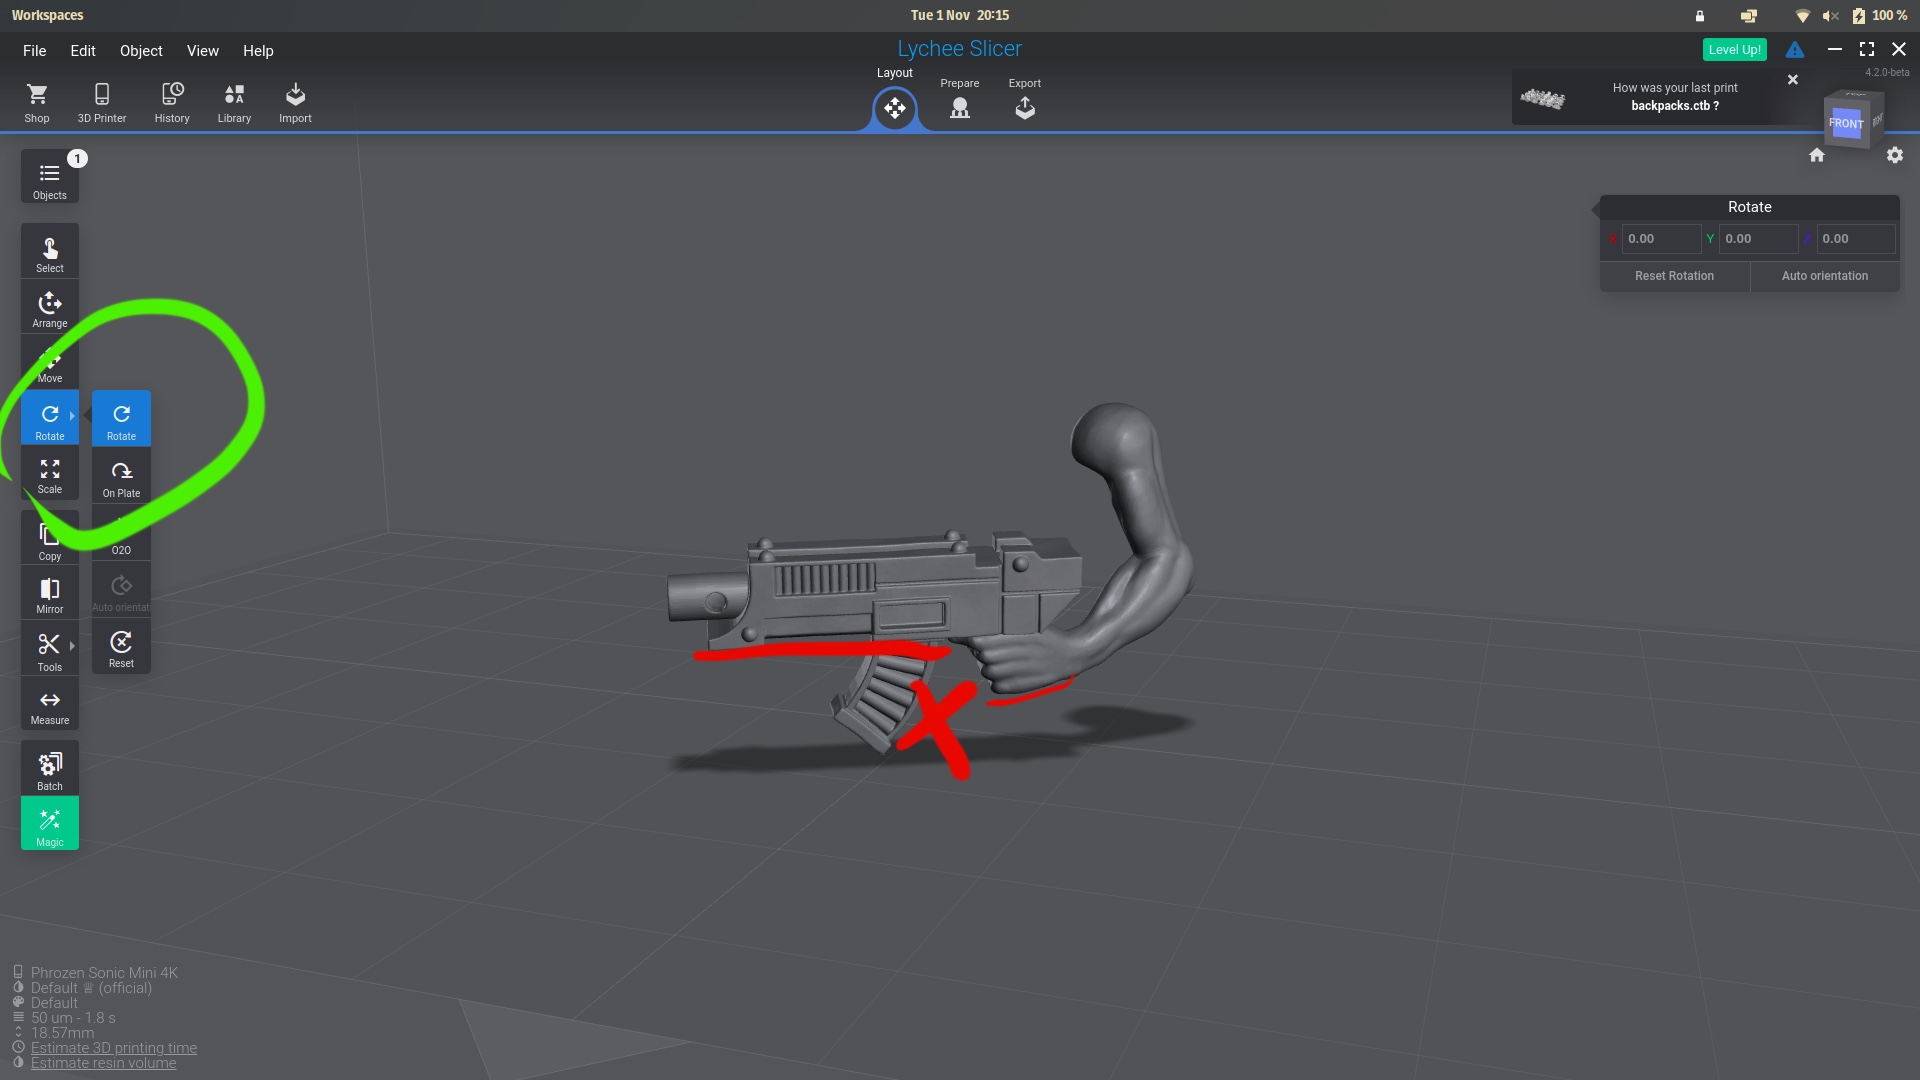
The following image contains the same mistake, even after rotation. The lower arm is parallel to the build plate and will have issues looking good coming out of the printer. Keep rotating until you find a good position!
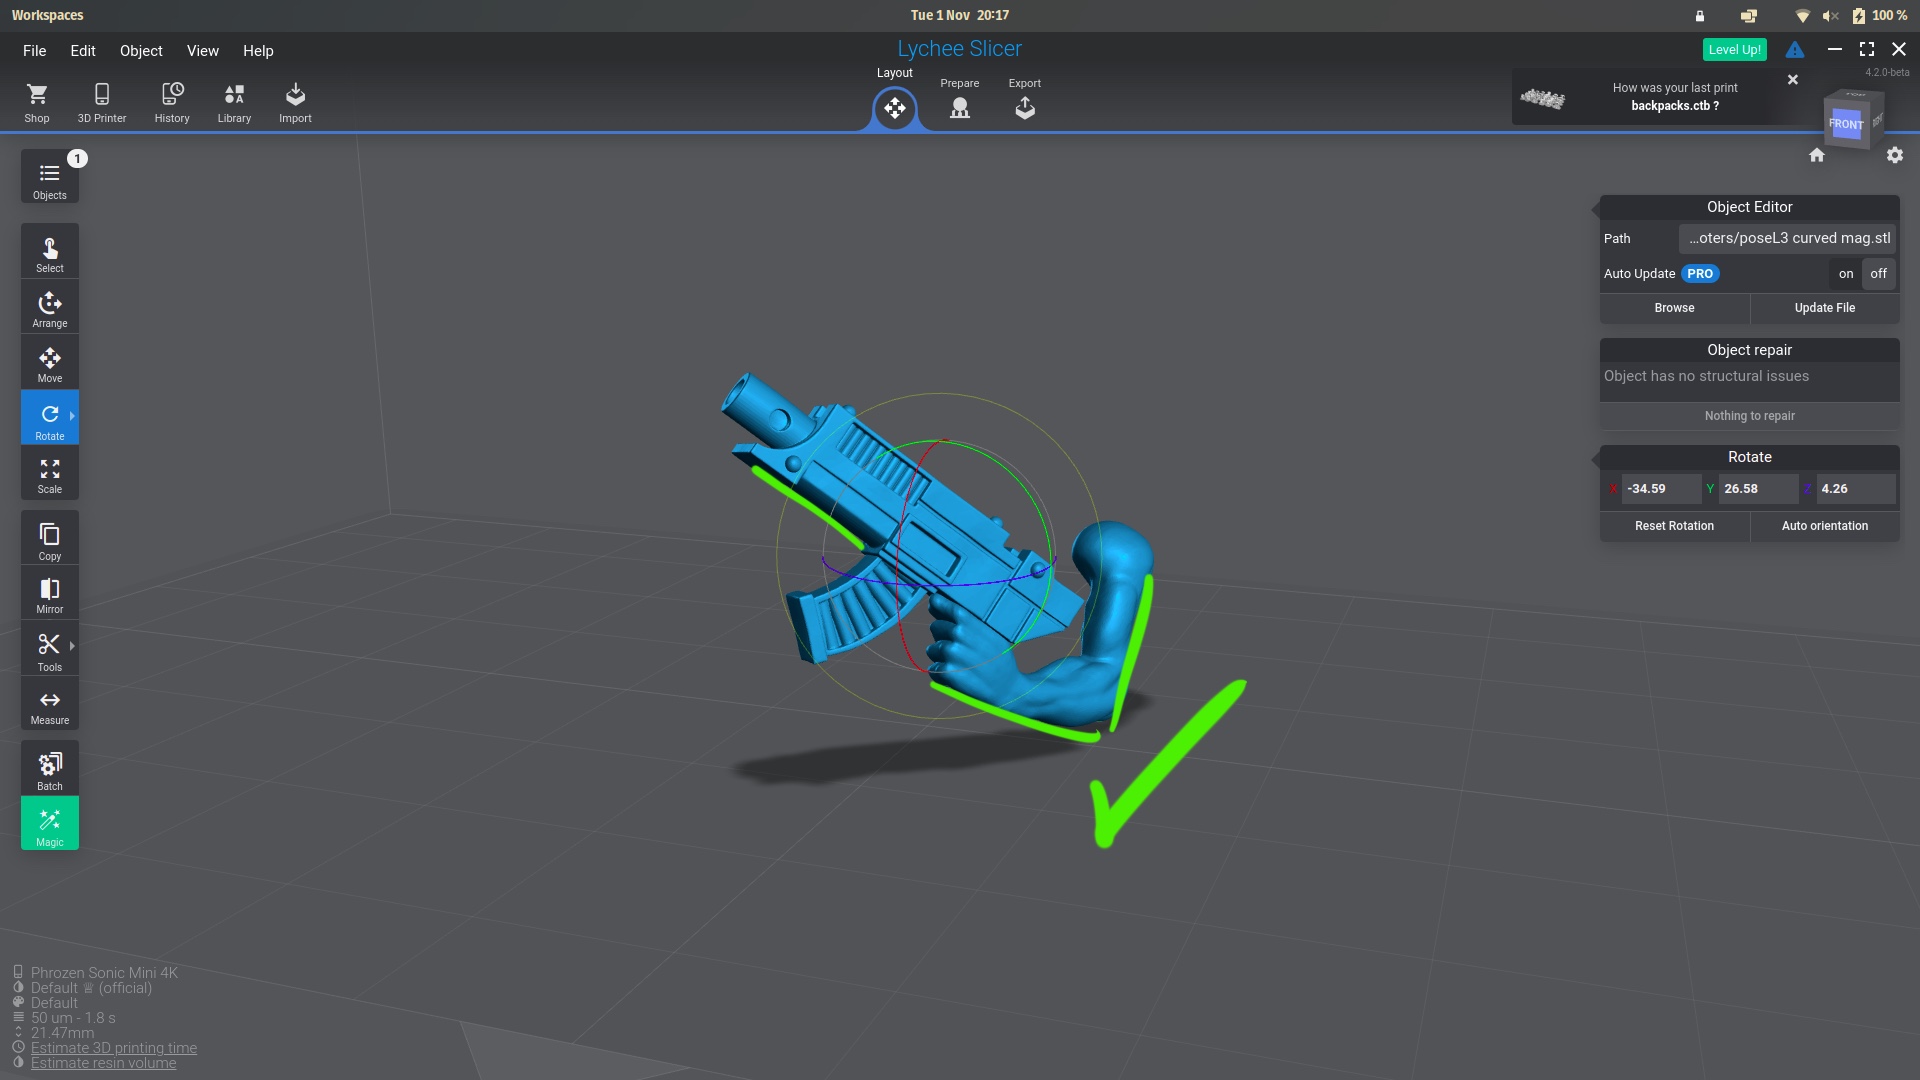
The following position has placed the flat surfaces of the piece at an angle with the build plate. This is what you're after. Remember to check the object from all angles.
2. Placing the supports
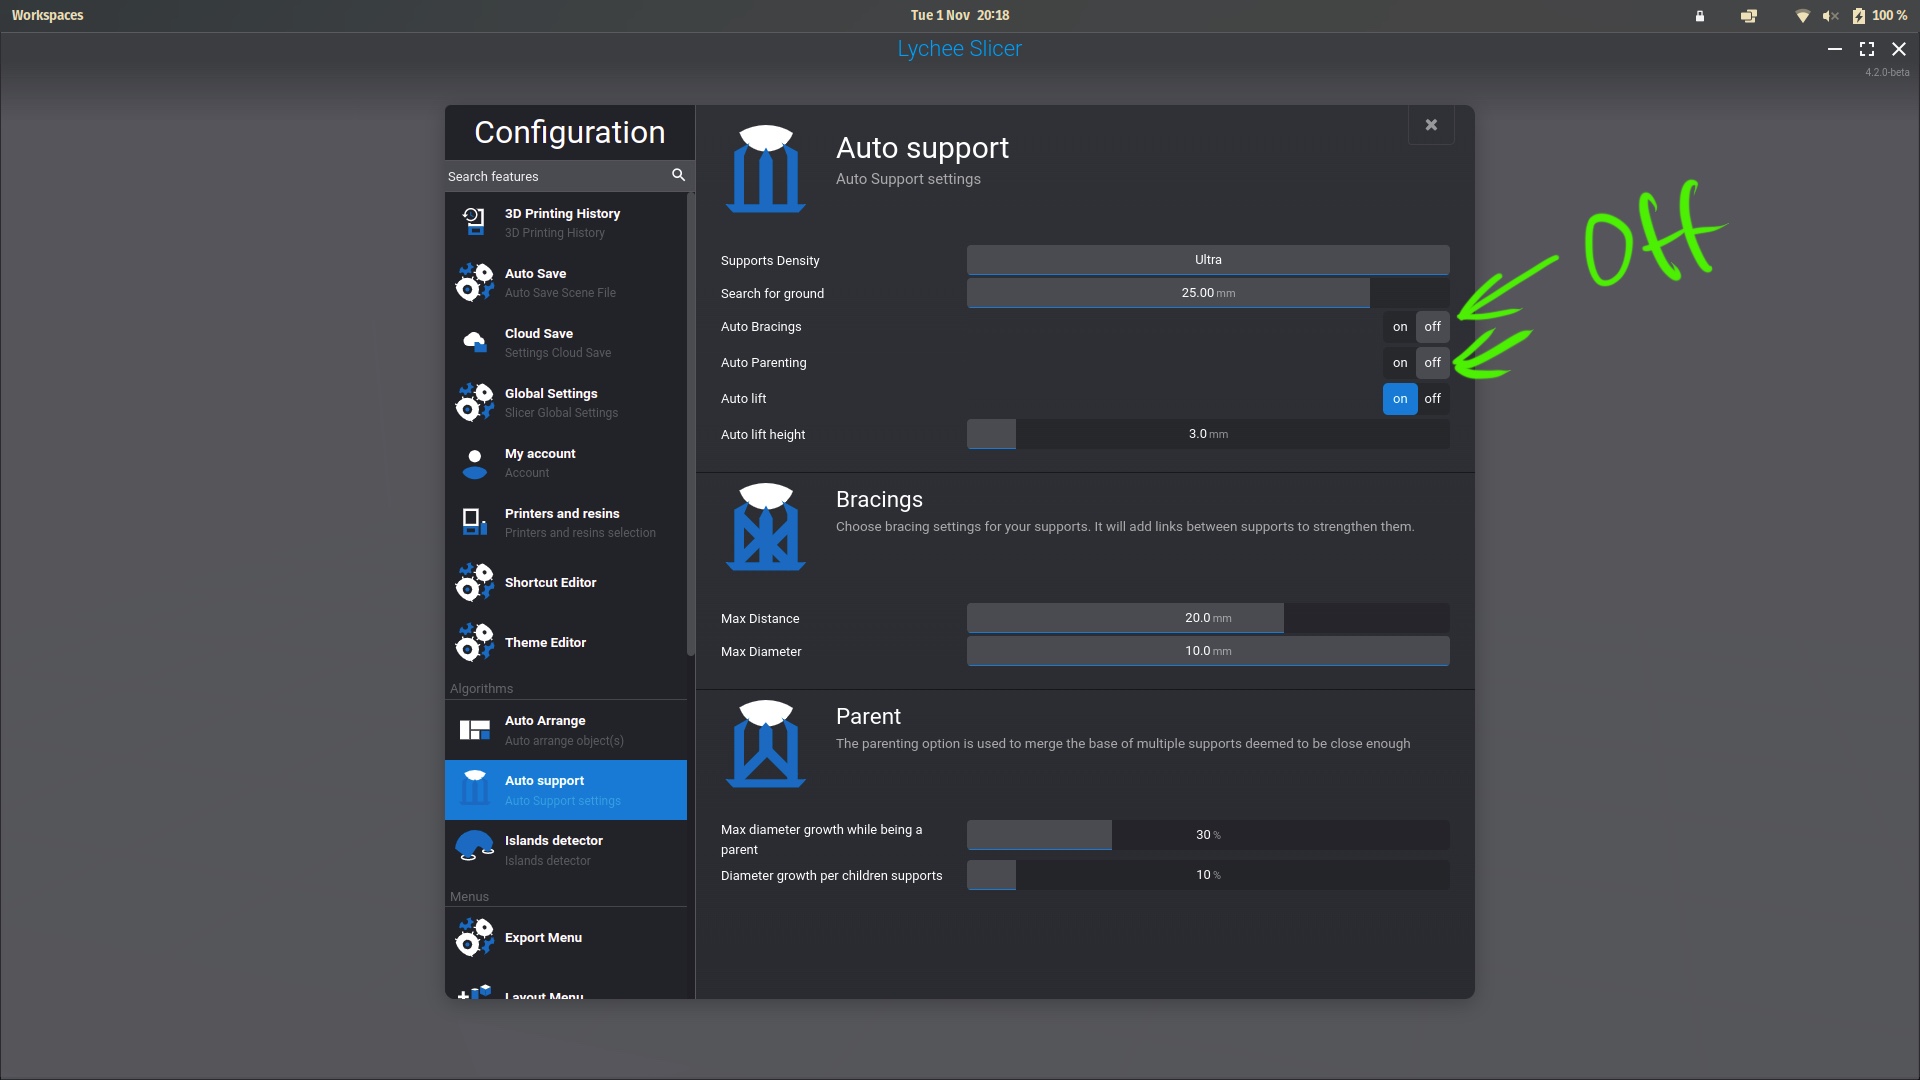
First of all: avoid using the "Magic" button on the left. That one has always given me issues. Instead, go to the right and choose "Auto", as indicated in the image below. Make sure to select light supports (arrow 1.), ultra density (arrow 2.), and finally check your settings (arrow 3.).
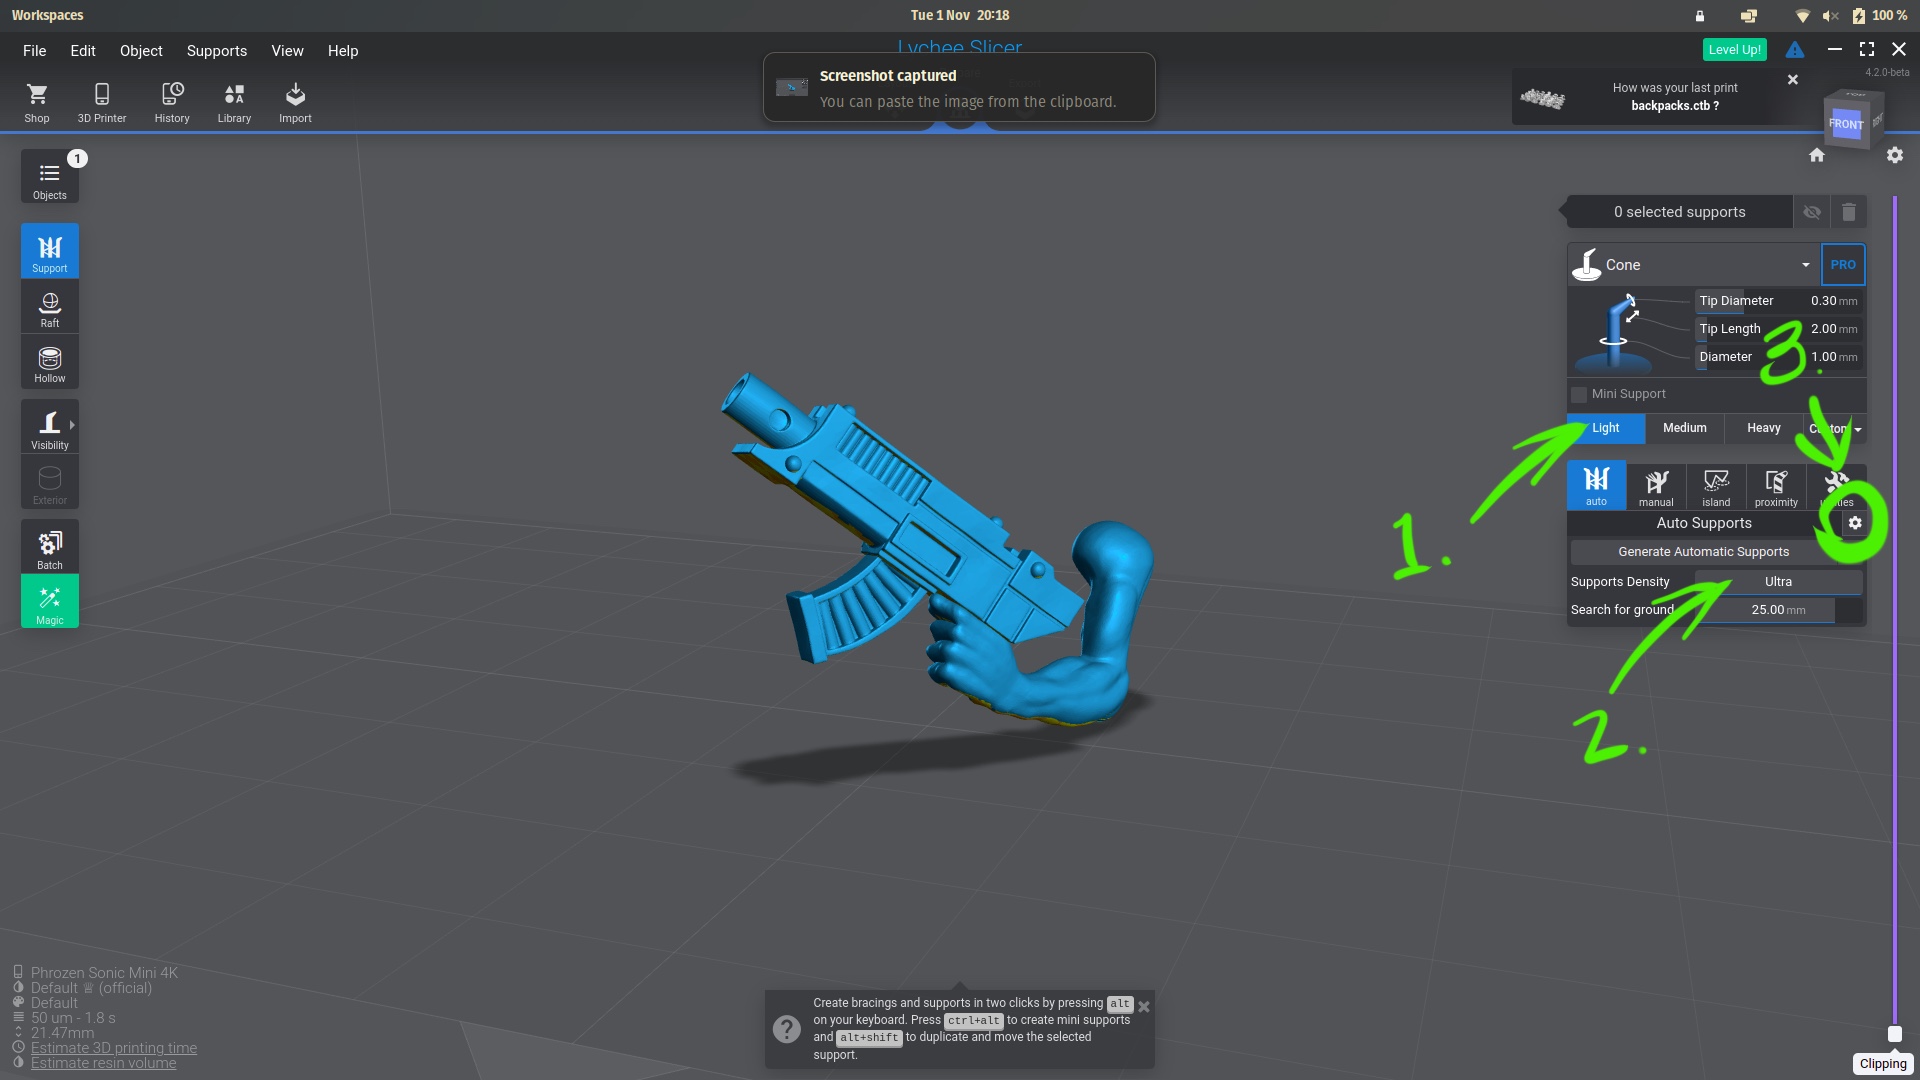
In the settings, make sure to turn "Auto Bracings" and "Auto Parenting" off. Save the settings, and generate the automated supports.
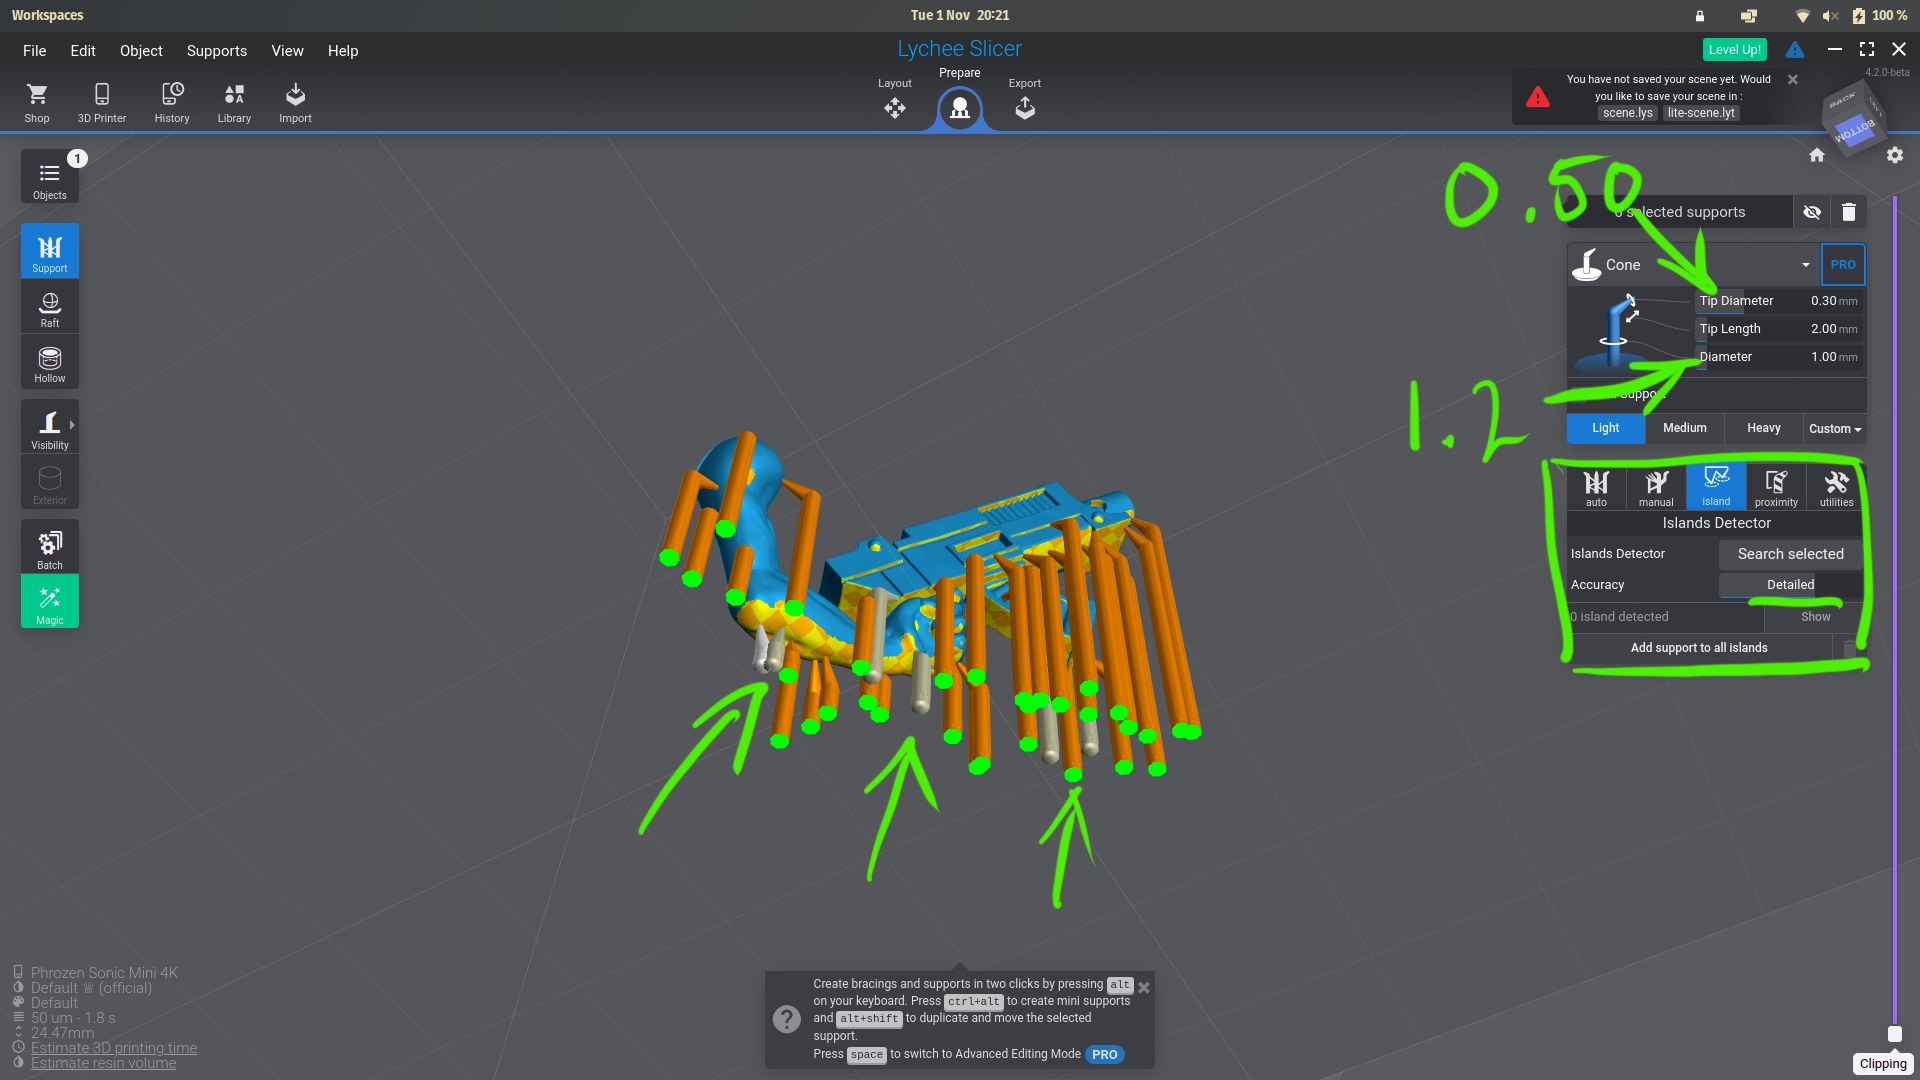
Next, select a couple of the placed supports that you imagine might be carrying a lot of the burden. After they are selected (shift-click to select several at once), increase their tip diameter to about 0.5, and their diameter to about 1.2.
Also, do a final check with the island detector tool, set to "detailed". This might catch some spots the auto settings missed, so add light supports there as well.
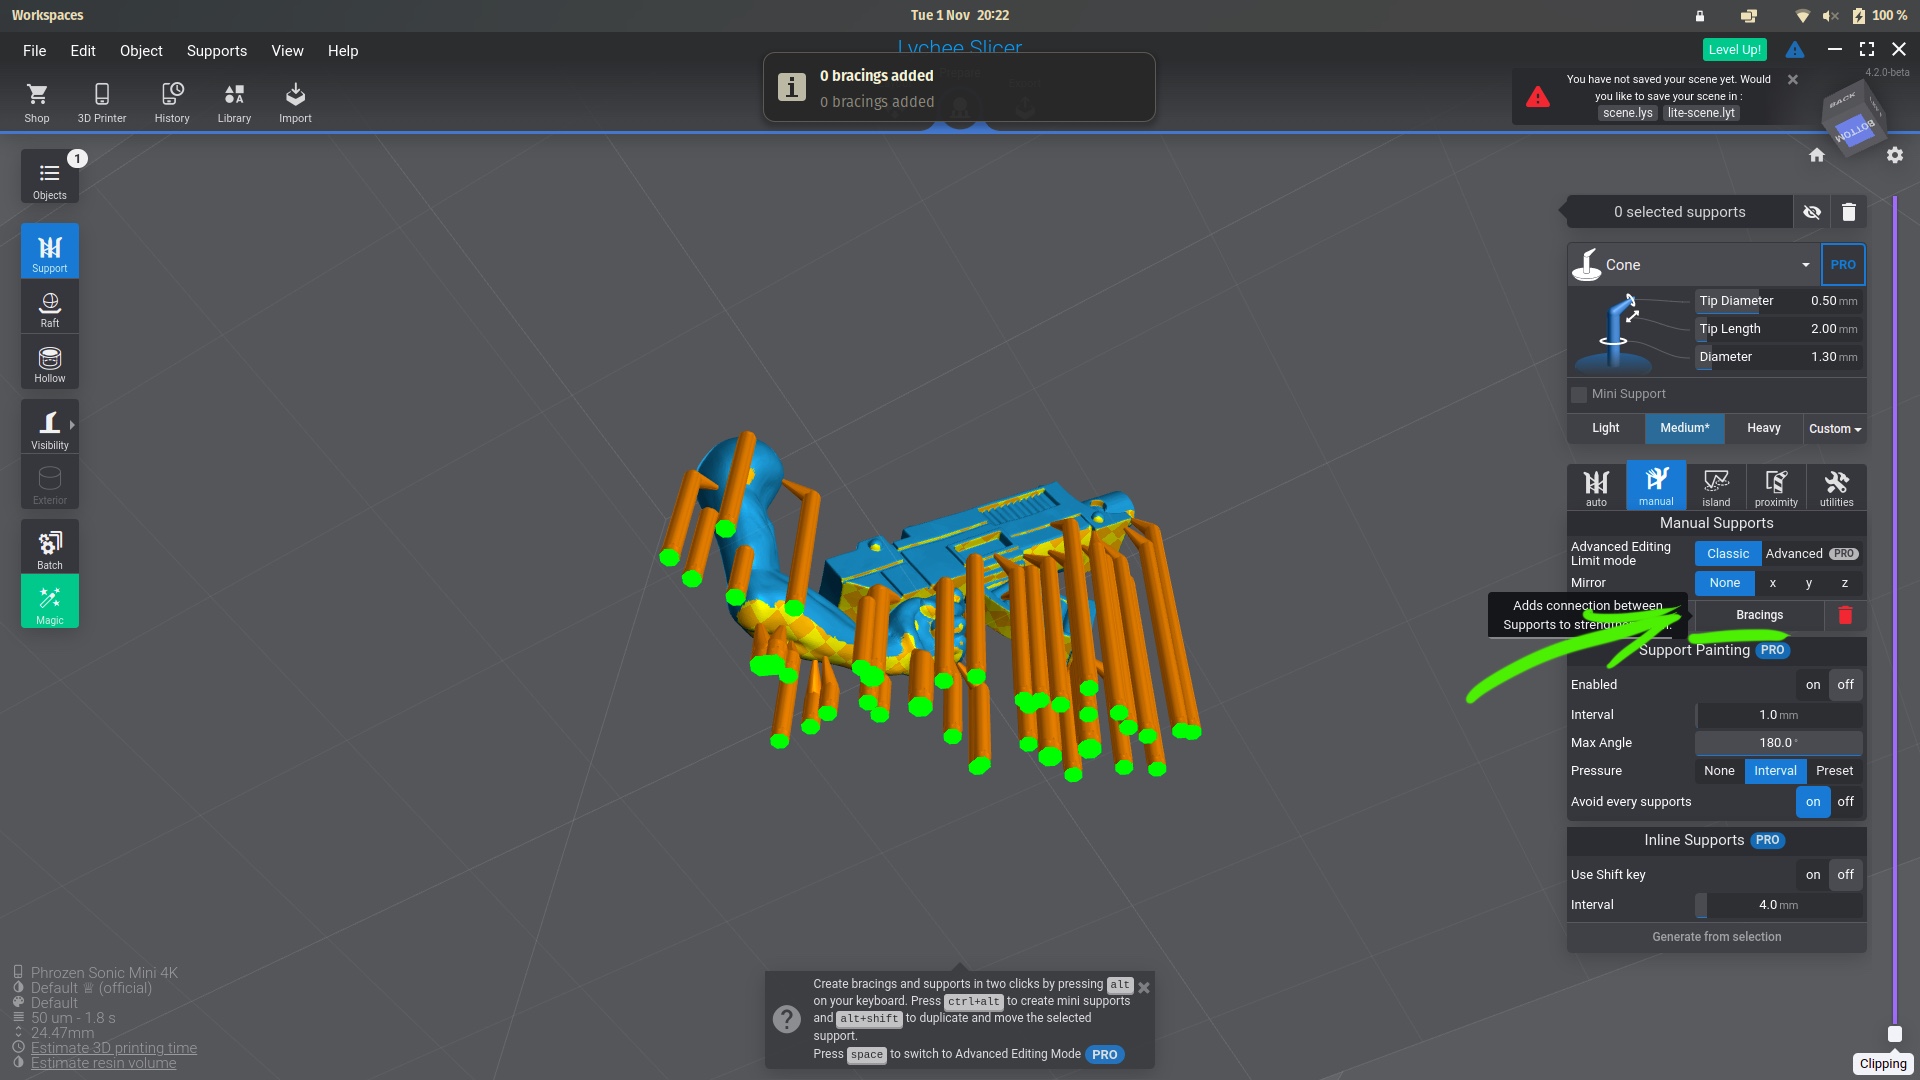
Go to "Manual" on the right, make sure either all or none of the supports are selected, and hit the "Bracings" button, as I show below:
Finally, check the "Raft" menu on the left, choose the one you prefer and knows works for you. My settings are always this:

Export and print! This seems to be working consistently for me, and I only have print failures when my build plate needs leveling.
Good luck!
Axel